*Thrifty Thursday* Fun Freebie & have stress free Holidays
I hope everyone out there in “blog land” is doing well this week! Are ya  relaxin a little? Takin good care of yourself? What? You say your stressin over the holidays? Well, say no more! Several years ago a friend got me hooked on www.flylady.net I am still a “flybaby” and proud of it! Maybe one day I’ll move up the ladder but I can be a slow learner sometimes. This is a great site to help you get and stay organized, even when my A.D.D. is kickin in?!? If you need help with running the household you can find ideas and how-to’s here! It has been invaluable tool for the Karoly house. They are giving away a totally free book this month too!
Go to: www.realforme.com/flylady Click on the “well-being for dummies” and fill out your info for this totally free, totally awesome book.
Are you making any gifts for the holidays? Need some ideas? Here are a few websites that you can get lost in for all the ideas you can handle! These are my very favorites!
Last but not least… http://www.etsy.com/
There are many, many more sites…if you have a favorite, please share it!
Roku TV UPDATE!
A few weeks ago I blogged about our Roku player and how we use it instead of Cable or Satalite tv. We have had it working wonderfully for this whole time! In fact, I’m thinking this has got to make cable a little nervous. It really is a great thing! We have had no problems getting exactly what we want to watch, when we want to watch it. We are debating about hooking HuluPlus up and that would cost $7.99 per month, but I’m waiting to see if there is another way to watch current episodes of cable shows. We are still getting caught up from last years episodes that we have missed through Netflix, that may take us awhile. Loving YouTube and other websites on our Tv! Anyone else out there have this or another streaming player? Let me know what you think of yours.
*TooT Tuesday* Upcycled Notebooks and Book Christmas tree
I have a few teens on my Christmas list this year. They always seem to be the hardest to come up with ideas for me. I made these personal, upcycled notebooks last year and they loved them. Ok, so maybe a few adults will be getting them this year…we’ll have to see who’s on the good list. They are really simple and cheap to make. Actually, they are kind of addicting! Here is all you need:
- Cereal boxes, record covers, vhs covers…if it’s made of cardboard, your good!
- Paper cutter
- Zutter book binder (or anyother kind of book binder)
- no bookbinder? Office Max binds books inexpensively
We all like to decorate for Christmas! These days who has the money to  spend on all those fancy decorations? I would rather make most of my own anyway…get the kidos help and you all can whip up one of these great Christmas tree books! As a kid I remember making phone book Christmas tree’s, where you fold the pages back and then add paint and glitter till your heart is content. These are simular, only difference is your cutting instead of folding. All you need to do is cut a template out of a closed book. Dab some paint and glitter, after its been cut, on the cut ends. Glue the front and back pages together…and whalla! You have yourself a pretty little tabletop Christmas tree. Leave it like that or dress it up a little, the kiddos will love helping decorate it!
**Thrifty Thursday on Saturday…CANCEL YOUR CABLE!!
I am STOKED!! When Doug lost his job last year we ditched cable tv to cut back on all of our expenses. Tv has not been fun since. We live next to Mt. Pleasant here in Lancaster and nothing comes in. On the rare occasion that we have a channel come in, somewhat clearly, it simply takes a truck to drive by and we are scrambled once again. Needless to say, our tv has not heard graceful language over the last year. Since Doug went back to work I have been tempted to go back to cable or satellite or anything…but I promised myself that we needed to be out of debt first. Until I happened to come across this site: http://www.cancelcable.com/  This site is awesome! Tells you everything you need to know about ditching that satellite/cable monthly bill!.
So here is what we have done:
1. Bought a Roku Player and Digital Antenna (that’s hooked up in our attic)
2. Signed up for Netflix($9.99 per month)
3. Sit back and enjoy the tv once again!!!
Seriously! The one thing that we did hate about cable, besides the monthly bill, was the fact that we would sit down and watch anything just because it was on. We always had to wait for our favorite shows to be on. NO MORE!!! Now we get to watch Hulu.com, YouTube.com, yep pretty much what we want to watch and WHEN we want to watch it!!! I’m officially LOVIN’ IT!!!
Our total Cost:
$99 for the Roku player (www.roku.com)
$35 for the HD Antenna
We will be paying $9.99 per month for Netflix
So for $120 per year, we get all of our favorite shows, movies, and many extra’s. We also went to Bestbuy and they do have some really neat digital players and tv’s that have the digital capability already built-in. We simply didn’t have an extra $1500 for the tv or $300 for the neat tv web browsers.
***Update 11/21/10::: If all you want to used is Netflix, there are cheaper ways than to get this box. This box allows you to use Netflix, Hulu (for all of the regular tv shows), and many, many other websites for streaming video and radio. I’ve been asked if you can watch current football games (OH..) , and my answer is… I’m not totally sure yet? We have found a ton, just not a current way to watch live sports…ie. that’s what we also have the antenna for. Live news, weather, sports.
Ok…so here is the totally FREE way to do this whole thing! Go to: http://www.boxee.tv/ Download the software and walla!!! you have instant tv with nearly everything from around the globe to watch!!!
Thrifty Thursday***
Sorry All…I thought that I would have everything tested and working so  that I would have the post ready for this weeks Thrifty Thursday. As it turns out we’ve been sick and haven’t had the time to get everything done so that I can give a proper review of the product that I’m going to talk about. If it works great then it will save us hundreds if not more per year!! So be sure to tune in on Saturday for the review!!!
In the mean time here is some thrifty tips:
*Next Weds the 24th is half off central Ohio Thrift stores (Ohio Thrift is my fav!) If you’re not in Central Ohio…call your thrift stores and see if they do this.
*Did you know that freezing your candles for an hour before using them makes them last longer? Do any of you do this?
*Reduce your milk consumption; substitute dry milk in cooking, homemade cocoa mix, and in half and half for drinking coffee or tea. You can’t taste the difference!
*Easy kitchen fixes: if you run out of powdered or brown sugar no worries, here is a cheaper way! For powdered simply put regular sugar in your food processor. For brown sugar, add 1 T. of molasses to approx. 1/2 cup of regular sugar. Easy peasy! I usually make my own anyway…just cheaper!
*If you’re an avid reader you will love  http://www.paperbackswap.com/index.php You get to swap books for free with other members!!! I love free books!! If your done with a book, instead of it collecting dust…trade it in for another!
Let me know if these small tips help or if your interested in saving mulla in a particular area, maybe we can all share some great ideas here. Please be sure to visit again on Saturday, I’ve been so excited about this simple little way of saving and even more excited about sharing it!!!
*TOOT Tuesday* Homemade Jelly from bottled juice
Ok, so I’m a little late on getting this weeks toot out. I’ve been feverishly working on Thrifty Thursday’s post. I’m so excited! So be sure to tune in to *Thrifty Thursday this week!!!
Today’s toot is making your own jelly very inexpensively. If you’re a busy  mom, like myself, then I’m sure you go through many peanut butter and jelly sandwiches. The problem is that jelly can really add up in price, at around $2.00 to $4.00 per jar for the typical grape jelly multiplied by however many jars a week you go through. Not to mention that most of the store-bought jellies are loaded with sugar! Well there is a cheaper way…
Here is what you will need:
1-32 oz bottle of 100% Grape juice
1-32oz bottle of 100% Apple juice
1-2 boxes of low sugar fruit pectin
Sugar (the amount varies according to which fruit pectin you use, it will be on the package)
Canning Jars and lids
Step 1: Wash the jars (in dishwasher if you can) *start boiling a small pot of about 1-2 cups of water to sterilize the lids
Step 2: Start boiling the juice in large pot
Step 3: Check the directions with the pectin on how much sugar you will be adding to your jelly and get it ready. Don’t do like me and have everything else ready and going and then need to work out the math at the last second!
Notes about pectin: I usually add about 30% to 50% more  pectin (just open another pack and add a little) or else the jelly is runnier than I like. With a little practice, you’ll find out exactly how much pectin to get the thickness you like.
Step 4: Add the sugar to the boiling juice and let it dissolve…then add the pectin. Let it boil for a few minutes. (unless the directions on the box say differently)
Step 5: Testing for Jelly thickness.
I keep a metal tablespoon sitting in a glass of ice water, then take a half spoonful of the mix and let it cool to room temperature on the spoon. If it thickens up to the consistency I like, then I know the jelly is ready. If not, I mix in a little more pectin (about 1/4 to 1/2 of another package) and bring it to a boil again for 1 minute.
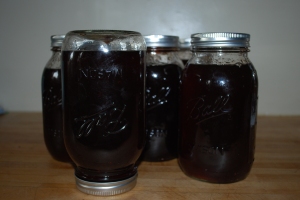
 Step 6: Fill the jars and put the lids (that have been boiled for about a min.) and rings on them. Quickly put the jars upside down and leave them like that overnight.
You can turn them over after they have totally cooled (this saves you the step of boiling the jelly to seal)
Experiment! Try different kinds of 100% fruit juices and spices…my next batch is going to have jalapeno in it or maybe cardamom. Once you get the basic recipe down along with the type of pectin you use, the combo’s of flavors can be endless!
Making Jelly this way cost about .40 cents per pint compared to $3.00 per pint in the store!!!
Wrap them up pretty and give as gifts!
*Thrifty Thursday* Save some Nugget in your Budget
I so love being thrifty, and totally believe that will never change about me…even if some meteor landed on our roof with a quazillian dollars! Sure, I  may hire someone to fix our roof instead of doing it ourselves but I will always be frugal…It’s fun! A friend told me about a website this week that I didn’t know about, I know, a thrifty site that I haven’t been to…Amazing isn’t it…It’s great! It’s http://moneysavingmom.com/ Not quite the same as some of the other coupon sites because this one lets you match the local store deals with your coupons or coupons that you can print! Another great one is http://www.bargainstobounty.com/ So far between these two sites I have received many free items from both Giant Eagle and Kroger. There are plenty more bargains, but I just found out about this site a few days ago…give me some time, will ya?
I have people asking me all the time where do I find all of the coupons that I use. Well besides the ones that we all come across in the newspaper or bag thingy that you get on your door every weekend. I do get a few off of coupon websites, but to be honest those really aren’t my favorites. I find a ton in grocery stores…look next time, they are all over! Ask clerks. Stores have them and may or may not be on top of keeping them out for customers.  If you get magazines, sometimes books have them. Train yourself to have a “thrifty eye”. One of my favorite websites that I have saved hundreds @ is www.vocalpoint.com If you sign up on this site, they send you hundreds of coupons and free samples. It does take about a month before they start sending them to you and they don’t overload you with a bunch of stuff you don’t need or want. Take some of their surveys on new products and you get to try them free! It’s a symbiotic relationship…you try stuff free, get plenty of coupons and they get to see if you like it or not.
Ps. Organize all of those great coupons in a 3 ring binder with clear baseball card inserts…or do like I do and get a scrapbooking picture organizer from Hobby Lobby, who btw has 40% off this week, here is their coupon: http://www.hobbylobby.com/assets/dynamic/_weekly.coupon/2010_46_coupon.gif
ps. Half price books is having a coupon sale this week. Here is the website for coupons: http://www.halfpricebooks.com/hpb945-110810s.html
Here is another coupon for Old Navy, Gap and others…you get 30% off and they give 5% of what you spend to the leukemia foundation (win, WIN) http://gap.p.delivery.net/m/p/gap/giveandget/emp/share.asp?id=13630381596&sms_ss=facebook&at_xt=4cca45bec253ce22%2C0
Ok ya’ll, I’m gettin lonely…show some love! If ya know of any coupons or sales going on Post em! Or just post somethin so I don’t feel so lonely out here in blog land 😦
*TOOT Tuesday* Invisable bookshelf & My favorite, Lofthouse Cookies
 I don’t know about you but I love, love those crazy Lofthouse Cookies that are so stinking expensive…I think they average around $4.00 per dozen. I have looked all over the internet for a recipe that even comes close and have wasted many baking hours only to be disappointed with the results. Well, not anymore! Here they are and I hope that you will love making them just as much as I do for the holidays…They will surely be a hit with everyone!
Ingredients
2 cups Jiffy baking mix
2/3 cup white sugar
1/3 cup milk
5 tbsp Crisco Shortening(I use butter flavored)
1 egg
1 tsp vanilla
Preheat oven to 350 degrees…Grease baking sheet. Mix all ingredients and spoon onto pans. Bake for 8-10 minutes and remove to cool. It’s that easy! Just be sure to use “jiffy” baking mix.
A really good frosting recipe:
Ingredients
- 1 cup shortening (I use buttered flavored Crisco)
- 4 cups confectioners’ sugar
- 4 tablespoons milk
- 1 1/2 teaspoons almond extract
Combine all ingredients in a mixing bowl. Beat on low-speed of electric mixer until well blended and very smooth. Smother on cookies, add sprinkles and watch everyone do their best turkey impression as they “gobble” them all up!
Invisible Bookshelf
I came across these nifty little things in a catalog and completely fe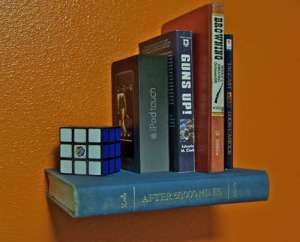 ll in “awe”. If you’re a book addict like myself then I’m sure you’ll completely understand. Do you fall asleep at night with a book, or two, or three? Are there piles of books that your currently reading somewhere in your house? I don’t know, maybe it’s my A.D.D. but I like to say it’s my love of learning something new that keeps me addicted. Anyway, we have little tables next to our bed but they hold the alarm clock and not much else…I really never have a place to put my books when I’m done. My kids seem to do the same thing, so this is on the list.
These little buggers are so easy peasy to make, I think I’ll make many!
Book
Good sized “L” Bracket
Carpet Knife
Pen
Small wood screws (of the flat-headed variety)
Large wood screws
Tape Measure or Ruler
Glue
A Stack of Books for Weight
Step 1: Measure the half way point, make a mark, set down your bracket, draw an outline, measure again, cut out a hole deep enough that the bracket will set flush. You are doing this to the back or bottom of the book, the part that will be visible in the finished product.
Step 2:
Use your knife to make a notch for the “L” bracket so the book can sit flush against the wall.
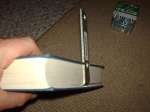
Step 3: place your small wood screws to secure the “L” bracket in place, and one on either side toward the edges of th e book to secure the pages of the book together. Hanging the bracket over the edge of a desk, chair, or counter is helpful. The pages will try to rise up the screw as you insert it, so make sure you’re putting some pressure on them to keep them in line. If this part is not done correctly the end result will show the pages as wavy and will tip-off the viewer that something is amiss. The picture shows me using a cordless drill, but I found that doing it by hand was much mo
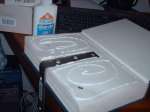 re effective.
Step 4:
The glue will hold the bottom cover of the book in place, and the screws hold the pages together.
Put the stack of books on top of the whole deal and wait overnight.
Yeah! Your all done and ready to use your new bookshelf! I’m putting one in each kids room and next to Doug and I on each side of our beds…maybe we won’t have such a book mess anymore? Altogether this cost about 3$, the fancy shmancy ones in the catalogs were over $20! What a savings!
Be sure to check back this week and next for the Toot Tuesday and Thrifty Thursday! I’m so excited about the things I’ve found for these days that I almost can’t contain myself!!!! Yes, I know, patience is a virtue….
Handmade Dishwasher Detergent Powder *Thrifty Thursday*
This is especially for Elaine (and anyone else who likes to save some mulla)! I found this toot on my absolutely most favorite website craftster.com This is a great recipe and is more cost-effective if you use vinegar in the rinse cycle and citric acid from a brewery store or can be ordered online…we have slaters here in Lancaster if your from around these parts.
Materials:
- 2/3 cup borax
- 2/3 cup washing soda
- 1/3 cup citric acid (in the form of unsweetened lemonade koolaid powder packets, 12 ct)
- 1/3 cup sea salt (or coarse kosher salt)
- Bucket/container (at least 1 quart in size)
Basically you want a 2 to 1 ratio for everything, where as the 2 is borax and washing soda, and the 1 is citric acid and salt. So if you wanted to do a full cup of borax and washing soda, you would need 1/2 cups of citric acid and salt.
I basically based my measurements above using the 2:1 depending on how much powder were in the 12 koolaid packets that I had.
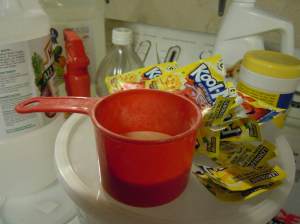 Which turned out to be roughly 1/3rd of a cup
Then I measured out the 2/3rd cups of Washing Soda and Borax
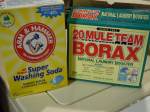
Then I measured the 1/3rd cup of sea salt (i did not have coarse kosher salt around, but i will use that instead in the future because it is cheaper; The reason for the salt is it basically helps to attack the crud and loosen it up on your dishes)
I tossed everything in this multi purpose quart container with lid that i 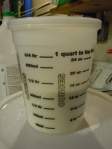 bought from the hardware store, put the lid on it and shook it all about. lol In case you can’t see in this picture, this made approximately 14 ounces of dishwasher detergent powder, which at the recommended 1 tablespoon per load = 28 loads of dishes. What a serious bargain!
I then tested this on a full load of dishes…
 I then put half a tablespoon in the “pre-wash” compartment, and half a tablespoon in the main compartment (the one that closes with a lid)
And let it go on the “pots and pans” cycle which is the longest wash cycle on my dishwasher.
About an hour or two later…………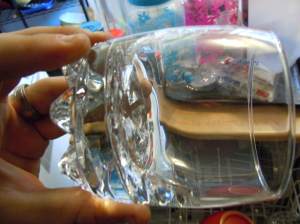
Nice clean dishes with no foggy glasses!
And there you have it kids. You’re No longer a slave to the “man” (sorta)!
So here is the breakdown in cost:
- Palmolive® eco+ gel 75 ounce detergent – $3.79 – 28 loads = $0.14 per load
- Jabs Homemade powder 32 ounce detergent – $2.33 – 50 loads = $0.05 per load
Here are the cost savings for my homemade rinse agent that goes along with this recipe:
- FINISH® JET-DRY® Rinse Agent 4.22 ounce solution – $3.99 – 1 fill = $3.99 per fill
- White Vinegar as a Rinse Agent 1 gallon solution – $1.79 – 1 fill = $0.06 per fill
THRIFTY IS FUN!!!!
Homemade Vanilla Extract *Toot Tuesday*
With the holidays quickly aproaching, many of us will do a ton of baking. I love it when I can make some of my own ingredients and save a some money in the process. What a better way to save some major dough than to make your own homemade vanilla extract. Make enough, and you could be passing it out as gifts to friends and family!
By following this simple recipe, you will make your own homemade pure vanilla extract for less than the cost of the store bought imitation.
Making homemade vanilla extract easy and cost effective.
What you’ll need
Ingredients
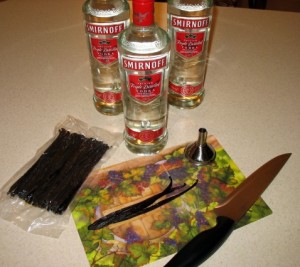
- 1 – 750ml bottle of Vodka, rum, or any liquor 80+ proof (80 proof = 40% alcohol)
- 12 – vanilla beans
Tools
- Cutting board
- A sharp knife
- A funnel for pouring vodka between bottles (optional but recommended)
- Bottles for storing the vanilla (I suggest glass bottles)
How to do it
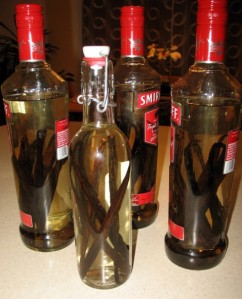
Using the funnel, remove approximately 1/2 cup of vodka from each bottle to make room for the vanilla beans. Using your cutting board and knife, slice each vanilla bean lengthwise along one entire side of the bean. Place the beans in the vodka bottle, replace the lid, and shake. Store the vanilla for 2-3 months in a cool, dark room. (Hurry and get started to use for those holiday gifts and dishes) I have made it in less time and used it, it may not be as strong so double the vanilla use.
Shake the vanilla once/week to agitate the beans and speed the extraction process.
How much you will save
Savings depend on quantity. I made 76 ounces using 3 – 750ml bottles of vodka and 1/4lb of vanilla beans, which provided the following savings:
Store bought cost
One 2 ounce bottle of store brand pure vanilla extract cost $4.99. Total cost = $2.50/ounce.
Homemade cost
3 bottles of vodka (“a fifth” or 750ml) cost $10 each for a total of $30. 750ml x 3 = 2250ml which is equivalent to 76 ounces. 1/4lb of vanilla beans (approximately 36 beans) is equivalent to 4 ounces and cost $10. Based on these calculations, 76 ounces of pure vanilla extract cost $40. Total cost = $0.50/ounce. Imitation vanilla cost approximately $1.00/ounce. This reveals that homemade vanilla extract is 5 times cheaper than store bought pure vanilla and twice as cheap as imitation vanilla.
Pictures of our homemade vanilla project
When we began
When we finished
How things look after one week of storage
Based on the ease and savings of this project, making homemade vanilla extract is a great way to save money and increase freedom.
Where to buy your vanilla beans
Thanks for Trent of The Simple Dollar for pointing me to the Vanilla Products USA eBay store. I purchased 1/4lb of Organic Grade A Tahitian beans for $6.99 plus S&H (at time of writing.) The beans are not certified organic by the USDA, but are claimed to be grown without any chemical fertilizers or pesticides.
Where to buy your glass bottles
Either use glass bottles you already have laying around your house or purchase them from somewhere cheap. I will probably purchase these 4 ounce glass bottles, fill them, and give them away as Christmas gifts.
*IMPORTANT CHEAP TRICK!!! Do not throw away those vanilla beans when your vanilla extract is finished!!! Re-use them in the next bottle!! They are good for about 6-7 years….YES, YEARS!! of use!! Now talk about a major savings…
Giving credit where credit is due… this tutorial came from an awesome blog http://diynatural.com/homemade-vanilla-extract/ who has some more recipes and thrifty living recipes…check him out!
Take the HANDMADE Pledge!!!
I absolutely LOVE making things. I’m the kind of person that walks into a store and just won’t buy something because, I just know, I can make it with less money. sometimes that’s good, sometimes not so good. Whats funny is my kids have become the same way. They inspect something, look all over it and say “hey mom, I can make one of these”! My heart leaps when they do that. I know I have passed down my desire to be more self sufficient.
I also love books, ok…It’s an addiction, I admit it! “Hello, my name is Amy and the last time I read a book was 20 minutes ago”. Thank goodness there isn’t such a group! Book stores are like crack dealers for me… “I must stay on budget, I must stay on budget” becomes my mantra when I walk through the doors. What does my love of books and making  things have to do with one another you ask? Well… not only do I make most, if not all of, of the gifts that we give over Christmas. I also have plenty of resources to get ideas. So coming in November I’m going to start “Toot Tuesdays”. I’ll put up a tutorial on how to make one of the gifts that I’ll be giving this year. I may even have a contest to win one if time allows. I’ve taken the “Handmade Pledge” will you? Work your way up…If you can’t make everything, or buy all handmade then set a goal of 50% handmade. You will be happy with the results, and you will be helping to support us and not China! Not to mention the mulla you will save. A good site to start if you want to buy handmade is etsy.com
